Hardware assembly was easy peasy, but the quest to install an operating system devolved into two days of furrowed brows and steam belching from my ears. I agree this sounds a bit like a horror story, and the point of this series is to entice you to build your own computer. But it’s also my goal to document the whole process, so I can’t just not say a word abut something that went less smooth than expected.
Also, a disclaimer up front: this was a fairly Linux-specific problem. While I’ll happily bash Windows every time of day, this would have been an embarrassingly trivial affair. I’ll post the procedure for a Microsoft OS below.
Overview And Primer
Before we jump into everything that didn’t work as expected, let me bring you up to date on the general situation. The old computer let me boot into two operating systems: A literally unused installation of Windows 7 (that I kept as a fall-back in case I really needed to use Windows) and Linux Mint 17 (Official site, Linux Mint at Distrowatch.com, Wikipedia), a very beginner-friendly distribution. Since I never used Windows anyway, and grew a bit annoyed with some parts of Mint’s philosophy, I planned to ditch Windows and try a new distribution. For several reasons, my choice was Manjaro Linux 16.06 (Official site, Manjaro at Distrowatch.com, Wikipedia).
A short aside on Linux and distributions
There isn’t one OS called Linux – rather, Linux is just the operating system kernel. To make it into a full-fledged operating system, it gets bundled as a big system of software packages to provide all the functions we expect from an OS, from managing files on hard drives to providing a graphical user interface. Such a set of bundled packages is called a Linux distribution, and there are a whole lot of them.
Anyway, the usual procedure of installing Linux is to download the installer image from the distribution’s official website, burn it onto a DVD, or put it on a bootable USB stick. You then insert it/plug it in, and let the computer boot from it. It will load a fully functional version of the distribution (without installing! It’s perfect for trying out risk free.) that you can use, or choose to start the installation process from.
Getting This Damn Thing To Install
After assembling all the hardware, we plugged in monitor/keyboard/mouse, and switched it on. At this point, all the computer can load is the mainboard’s onboard control software, the BIOS. It’s usually wise to check if the bare computer will boot to BIOS, because if it doesn’t, there’s problems to solve before you go on installing things. (Could be defective hardware, not having plugged in something important, RAM modules in the wrong slots, etc.) BIOS loaded without a hitch, though, so on to the next step we go.
We put in the Manjaro USB stick, tried booting, and it froze along the way. Booo, this is not how it’s supposed to work! Several fruitless attempts later, I tried booting my old Mint 17 DVD. That worked and also displayed a warning message that Mint could not recognise my graphics card and would run without graphical acceleration. A light bulb went off! Support for hardware is dependent on the Linux kernel (new versions add support for new hardware) and in some cases, like nVIDIA graphics cards, manufacturer-supplied drivers. My graphics card is fairly new, so it’s no surprise old Mint 17 doesn’t know it. But maybe the nVIDIA drivers on the Manjaro image weren’t new enough either. Since we were running Mint 17 from the DVD at this point, we used it to connect to the internet and looked it up. Sure as hell, the included drivers were one release too old for all the new graphics cards.
A short aside on installing software on Linux
If you’re used to Windows, installing something means you download an installer, doubleclick it, and then you have the new software available. If the program can check for updates on its own, good for you, because if not, it’s your job staying on top of new versions. While this way is technically possible in Linux*, the preferred method is to use the system’s package manager and repositories. Think of them as a big catalogue of available software, a download place for this software provided by the distribution maintainer, and a program that allows you to browse this catalogue and install programs plus all the additional software it requires.
The big upside: The distribution maintainer tests new versions of each program for compatibility before making it available in the repositories. If you installed a program via your package manager, it will periodically check for updated versions and you get updates for all your programs alongside updates for your operating system. (Seriously, this is just the best.)
The big downside: For this level of maintenance comfort, you’re largely dependent on what the maintainers make available in the repositories. Philosophies differ, and some distributions push updates only after extensive stability testing, while others aim for providing the newest versions as fast as possible. (And occasionally, you get something new that doesn’t play nice with older versions of something else and then you get to run and try to fix things.)
Kinda stupid solution: Well, if it’s the graphics card, let’s try this with the CPU’s onboard graphics. We removed the graphics card, plugged the monitor into one of the mainboard’s connectors and tried again. Ha, it worked! A few minutes later, the computer was running a fresh installation of Manjaro. Success! Or so I thought.
Doing This Graphics Card Thing Smarter
Because some time in the future, I’ll have to install the nVIDIA drivers for my new graphics card anyway, I figured why not use my old graphics card until then? It uses the nVIDIA drivers as well, and that way, I’ll easily know when the new version hits and have faster graphics than the CPU onboard stuff. Easy right? Theoretically, yes. I tried for the rest of the night (until ~6am) to get this to work with no avail. That’s why the previous solution was kinda stupid: Had I thought of using the old graphics card sooner, I’d have installed Manjaro with it already plugged in and let the installer sort out which drivers to install. This way meant to tell the OS to also make these drivers available, for hardware that isn’t yet plugged in, and make it recognise it on the next reboot.
The next day, I tackled it anew, and finally got it to work. (As usual, it was easy once I figured out which detail in the whole process I got wrong.)
Warming Up With The New Distribution
One reason why I wanted to try Manjaro was that they bundle a desktop environment (the software bundle that provides most of the graphical user interface – there are many of these for Linux) called KDE Plasma, that has been looking pretty damn spiff in its newest versions.
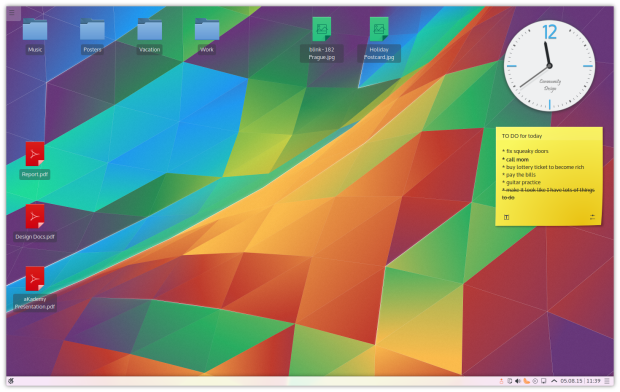
Isn’t it pretty?
While I really really like its look, I noticed pretty fast that I really don’t agree much with how they do things. This would either be a really long and forced warming up process, or we weren’t made for each other. I sighed with exasperation when it made me disable every. single. system. sound. manually, and still didn’t stay completely silent, and I figured that I’d probably, eventually get used to not being able to open the menu with just a hit on my keyboard’s Windows key.
But what really was the straw that broke the camel’s back was when my attempt to reconfigure audio output (to put the same signal both to my headphones and my speakers) made the entire audio device vanish from the system. On top of that, it refused to recognise the proper encoding of the file and folder names on my external hard drives, even when I explicitly set them to what I knew they were. So exasperating!
Country Roads, Take Me Home
Realising I’d probably spend up to a week fighting this system for trivial things like having my file names not display all garbled, and probably having to reinstall anyway just to get sound back, I decided to go back to Linux Mint for the time being.
So I went downloading the newest version of Linux Mint (18!), quickly installed it, and that’s been the setup since then: The old graphics card is still plugged in because the new drivers won’t be showing up in Mint’s repositories for a while, and running Mint 18 because I have some experience with Mint and need a computer that I can get work done on.
The plan right now is to wait until I get my notebook for work in September, and then try finding a nice distribution for the desktop. Having to do some OS fiddling is a lot less stressful when there is a working backup computer on the side.
Anyway, what a ride, huh?
What This Would Have Looked Like In Windows
Windows doesn’t have a system relying on software repositories, so all you do, after installing it from the DVD/USB stick is:
Either download the newest graphics card drivers from the manufacturer’s website or use the probably slightly older ones that came on the disc with the graphics card, install them, reboot, and Bob’s your uncle. I hate to admit it, but this is a case where the Windows way is more flexible and has almost no overhead adapting to new hardware.
This is possible in Linux, of course, but much more involved.
*) The original software installation method on Linux actually is to download a program’s source code and compile it into an executable program yourself. The packages you get from a repository are pre-compiled executables for this system’s environment.
